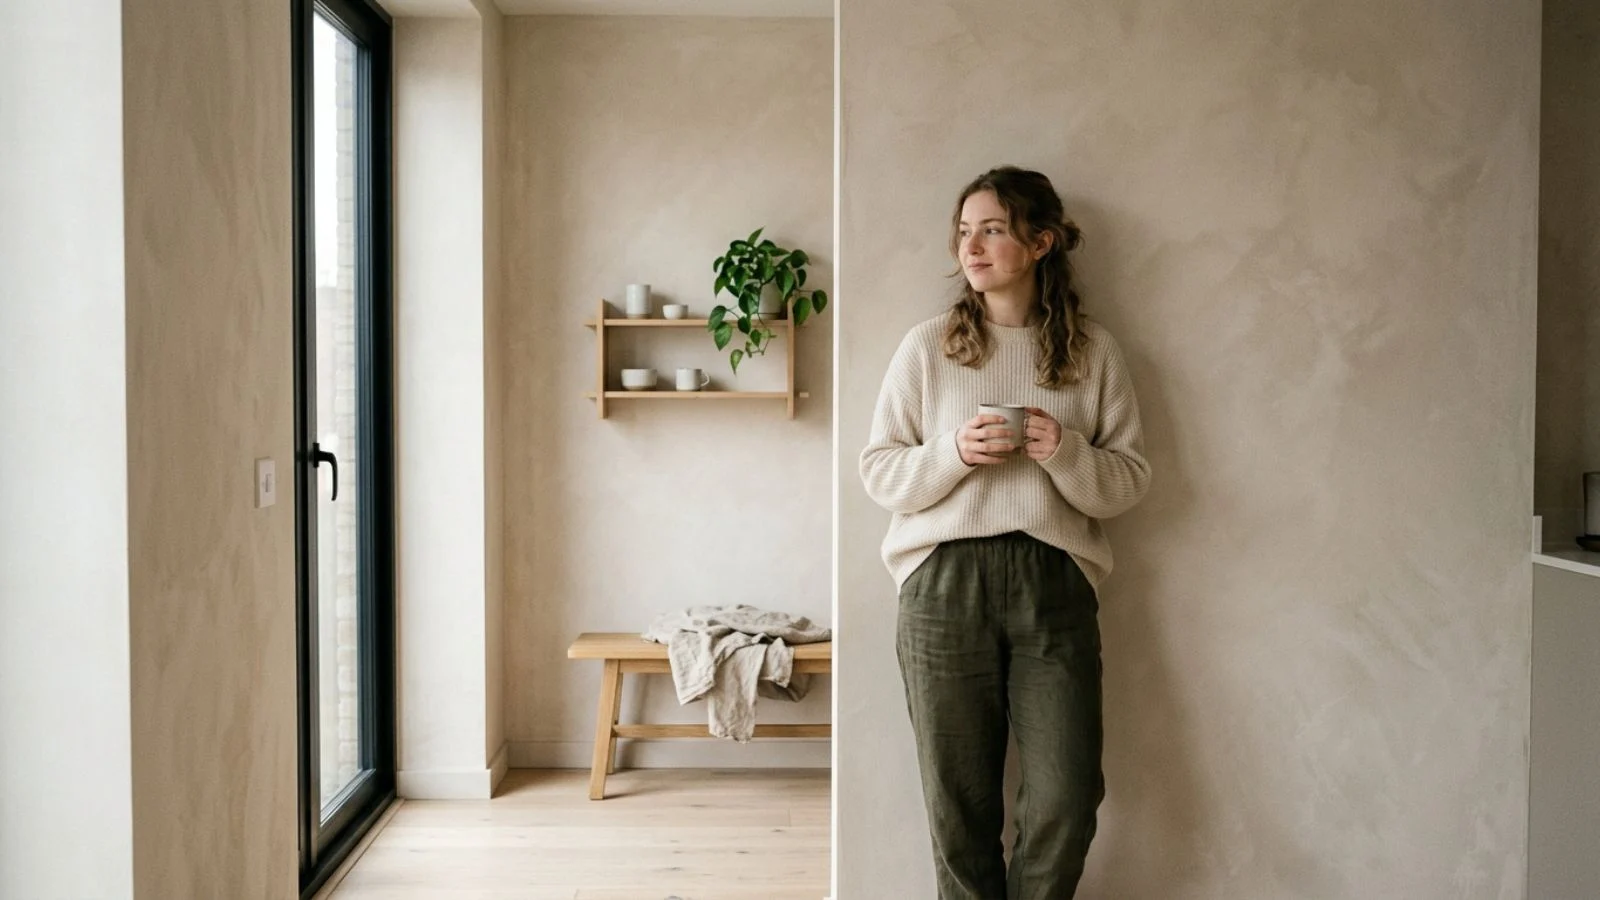
Limewash is having a serious moment in home design and once you see it in person it’s easy to understand why.
Walk into a farmhouse in the French countryside or scroll through modern interior design accounts and you’ll spot that same soft cloudy almost weathered texture on the walls, a look that feels both ancient and completely current.
But here’s the twist: limewash isn’t painted at all. It’s a mineral-based finish made from slaked lime and it behaves nothing like the flat even coats you’re used to rolling on with a standard latex paint.
The good news is that this old-world technique is more approachable than it looks and with the right prep and a little patience you can achieve it yourself.
In this guide we’ll walk through everything from what limewash actually is to prepping your walls, mixing the product, applying it correctly and avoiding the most common mistakes beginners make.
What Is Limewash?
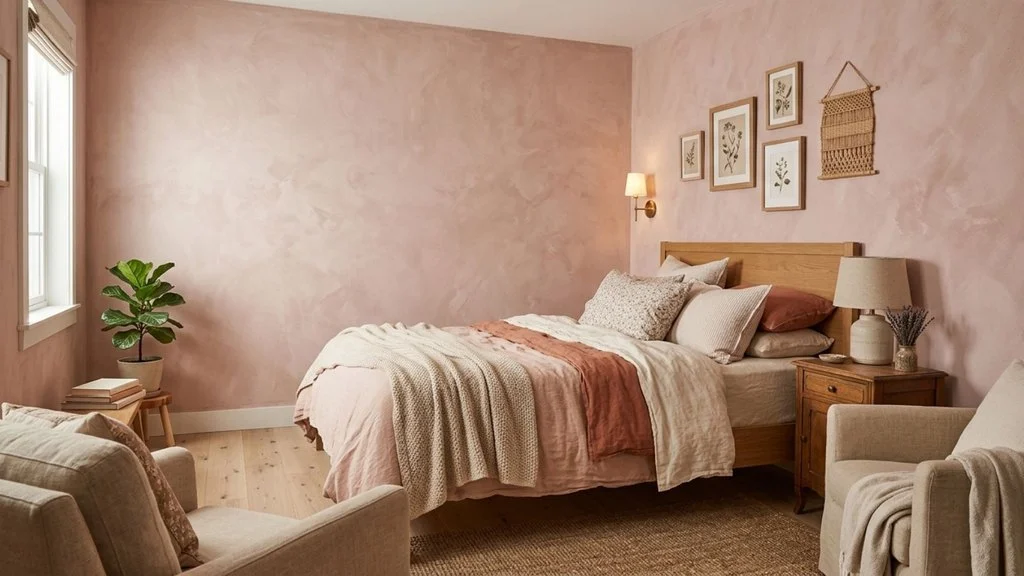
At its core limewash is a mixture of slaked lime also known as calcium hydroxide combined with water and optionally natural mineral pigments for color. That’s it. No acrylics, no synthetic binders, no plastic resins. This simple formula is exactly what sets limewash apart from every can of paint sitting on a hardware store shelf.
Standard paint works by forming a film on top of your wall; once it dries it essentially becomes a thin plastic layer sitting on the surface. Limewash works completely differently. When it’s applied it undergoes a chemical reaction called carbonation where the lime absorbs carbon dioxide from the air and slowly converts back into calcium carbonate essentially turning back into a soft chalky form of stone. In the process it actually bonds with the porous surface underneath it rather than just coating it.
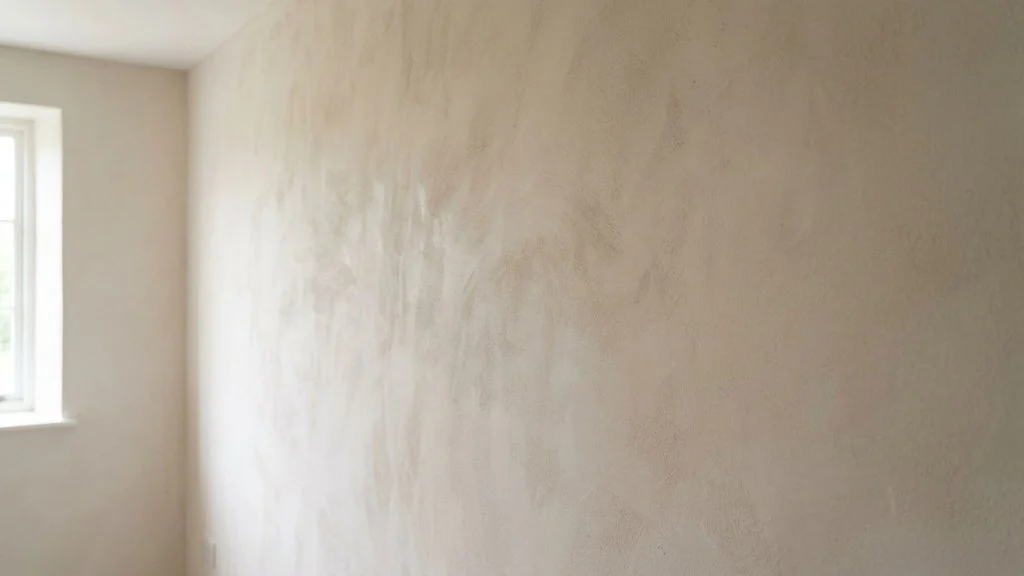
This chemical quirk is exactly why limewash looks the way it does. Instead of flat uniform color you get soft clouding, subtle depth and gentle variation from one patch of wall to the next along with a matte velvety finish that shifts slightly depending on the light and time of day.
Limewash isn’t a new trend either it’s been used for centuries on plaster and masonry walls throughout Europe partly for its appearance and partly because it’s naturally breathable and mildly antimicrobial which made it a practical choice for old stone and plaster construction long before modern paints existed.
Pros and Cons of Limewash
Like any specialty finish limewash comes with real trade-offs worth understanding before you commit a whole room to it.
The Pros
Limewash is breathable meaning it allows moisture vapor to pass through the wall rather than trapping it, a big advantage for older homes with plaster or masonry walls that need to “breathe” to avoid damp issues. It also has naturally antimicrobial and antifungal properties thanks to the high pH of lime which can help resist mold and mildew growth over time. Aesthetically it offers a depth and texture that flat paint simply can’t replicate with soft variation that makes every wall feel one-of-a-kind. It’s also an eco-friendly option made from natural minerals rather than synthetic chemicals and it tends to age gracefully, developing more character rather than looking worn out.
The Cons
Limewash is less forgiving of moisture and heavy wear than standard paint so it’s not always the best choice for high-traffic hallways or splash zones in kitchens and bathrooms unless properly sealed. The application process is more labor-intensive requiring specific brush techniques, multiple coats and careful drying time between layers. Color consistency can also be tricky; the same batch can look slightly different from wall to wall depending on porosity and lighting. Finally there’s a genuine learning curve; first-timers often find the process (and the “imperfect” result) requires a mindset shift from typical painting projects.
Where Limewash Works
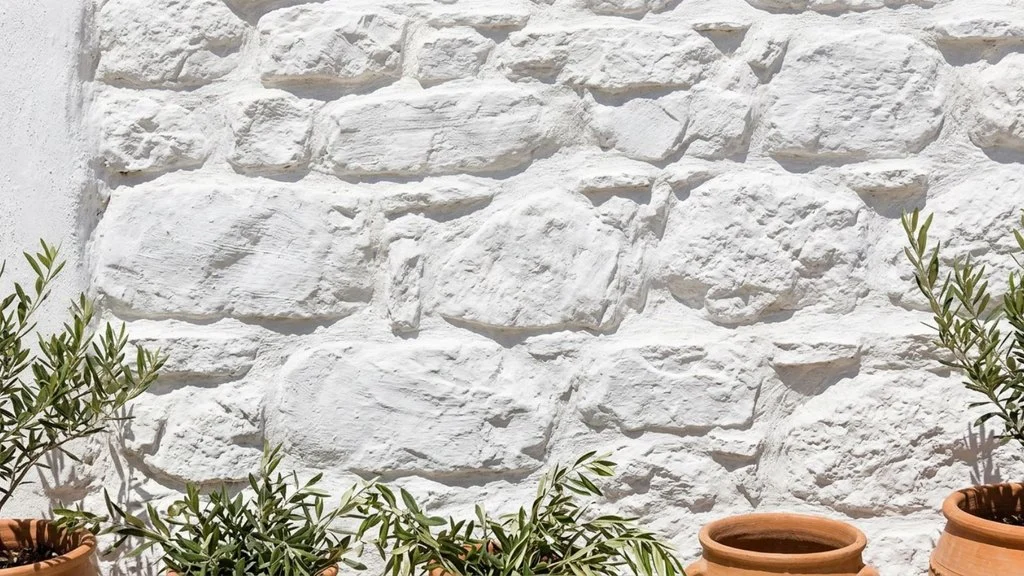
Best because limewash bonds chemically with its surface rather than simply coating it. The material underneath your paintbrush matters just as much as your technique. Understanding which surfaces are a natural fit and which ones need extra help will save you a lot of frustration.
Ideal Surfaces
Limewash performs best on porous mineral-based materials that can absorb and bond with the lime. Plaster walls are the classic choice especially lime plaster but brick concrete and stucco are also excellent candidates. Limestone and other natural stone surfaces take limewash beautifully as well which is part of why it’s so closely associated with old European architecture.
Surfaces That Need Extra Prep
Drywall which is the most common wall material in modern homes isn’t naturally porous enough for limewash to bond well on its own. It can still work but it needs a breathable mineral primer first to create a surface the lime can properly adhere to.
Surfaces to Avoid
Glossy sealed or previously painted surfaces (especially with oil-based or high-sheen paint) are poor candidates since limewash can’t penetrate or bond with a slick non-porous film. Tile laminate and most plastic-based surfaces should be avoided entirely.
Interior vs. Exterior
Limewash works well both indoors and outdoors and it’s historically been used on exterior masonry and stucco. Just keep in mind that high-moisture interior spaces like kitchens and bathrooms may need a protective sealer to hold up over time.
Tools and Materials Needed
Before you start gathering the right tools will make a noticeable difference in how smoothly your limewashing project goes and how close your results come to that authentic textured look.
Limewash Paint
You can buy limewash pre-mixed and ready to use or as a powder you mix yourself with water. Powder gives you more control over consistency and pigment strength while pre-mixed versions are more convenient for beginners.
Brushes
A natural bristle limewash brush is essential synthetic brushes don’t hold or release the product the same way and they won’t create the soft textured brushstrokes limewash is known for.
Primer
If you’re working on drywall a breathable mineral primer is a must so the lime can bond properly instead of sitting on top of a non-porous surface.
Mixing Supplies
A clean bucket for mixing along with a sturdy stir stick will help you achieve the right consistency and keep pigment evenly distributed.
Water Spray Bottle
Misting the wall as you work helps blend brushstrokes and prevents visible lap marks between sections.
Prep and Protection
Painter’s tape drop cloths fine-grit sandpaper and a wall-cleaning sponge round out your prep essentials.
Safety Gear
Rubber gloves and eye protection are non-negotiable since lime is caustic before it fully cures. A respirator or good ventilation is also recommended.
Optional Extras
A matte breathable sealer for high-moisture areas and a mild lime soap for long-term wall maintenance.
Wall Preparation
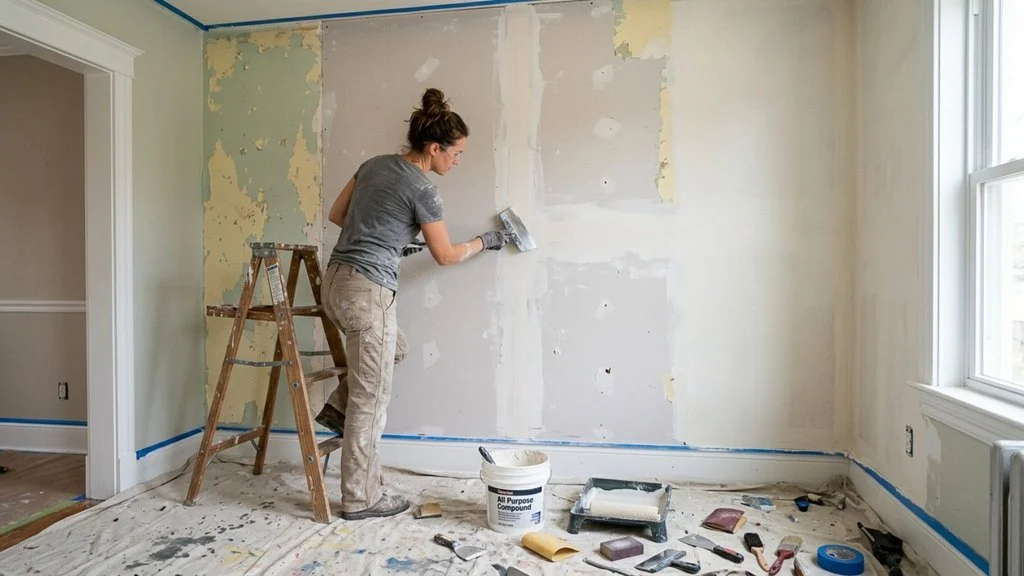
Proper prep is arguably more important with limewash than with standard paint since the finish depends on a clean porous surface to bond correctly. Rushing this stage is one of the most common reasons limewash projects fail to look right.
Clean the Surface
Start by thoroughly cleaning the wall to remove dust, grease , cobwebs and any grime. Even a light film of residue can prevent proper bonding so a wall-cleaning sponge or mild detergent solution works well here.
Repair and Sand
Fill any holes, cracks or dents with an appropriate patching compound and let it dry fully. Once patched, sand these areas smooth so they don’t create visible texture differences once the limewash goes on. Fine-grit sandpaper is usually sufficient.
Remove Old Paint or Wallpaper
If your wall has peeling paint, glossy finishes or old wallpaper these need to be stripped or sanded down. Limewash can’t bond properly over slick or unstable surfaces so this step isn’t optional if it applies to your wall.
Prime if Necessary
For drywall or other non-porous surfaces apply a breathable mineral primer and let it cure according to the manufacturer’s instructions. This step essentially gives the limewash something porous to grip onto.
Protect Everything Else
Tape off trim baseboards, window frames, outlets and any adjacent walls you’re not treating. Lay drop cloths generously since limewash tends to drip and splatter more than typical paint due to its thinner watery consistency.
Mixing the Limewash
Getting your limewash mixture right sets the foundation for everything that follows too thick or too thin and even perfect brush technique won’t save the final result.
Achieving the Right Consistency
If you’re working with powdered limewash combine it with water according to the manufacturer’s instructions aiming for a consistency similar to heavy cream thin enough to spread easily but thick enough to hold pigment and coverage. If your mixture feels closer to milk or watery, add a bit more powder; if it’s closer to yogurt, thin it with a small amount of water.
Let It Hydrate
Once mixed let the limewash sit for the recommended resting period often around 10 to 15 minutes. This allows the lime to fully hydrate and activate which affects both how it applies and how well it bonds once it’s on the wall.
Adding Pigment
If you’re customizing your color rather than using a pre-tinted product mix in natural mineral pigment gradually testing small amounts at a time. Keep in mind that limewash typically dries significantly lighter than it appears when wet so it’s easy to over-pigment if you’re judging color from the bucket alone.
Keep Stirring
Pigment and lime particles settle quickly even during short breaks. Stir your mixture periodically throughout the project not just at the start to keep the color and consistency even from the first wall to the last.
Testing Before Committing

It’s tempting to skip straight to painting your whole wall but a test patch is one of the most important and most often skipped steps in the entire limewashing process.
Why It Matters
Limewash behaves unpredictably compared to standard paint. It dries considerably lighter than its wet appearance and the exact shade can shift depending on your wall’s specific texture porosity and even the ambient humidity in the room. A color that looks perfect in the bucket or even on a paint chip can look entirely different once it’s cured on your actual wall.
How to Test
Choose a small inconspicuous section of the wall behind a door in a closet or a lower corner and apply the limewash exactly as you plan to for the full project using the same brush technique and number of coats. Resist the urge to touch it up or smooth it out; you want an honest preview of how your technique and mixture will actually look.
Be Patient
Let the test patch dry and cure fully which can take up to 24 hours before making any judgment calls. Limewash continues to lighten and settle into its final color as it cures so evaluating it too early can lead you to make unnecessary adjustments.
Adjust as Needed
If the color is too intense, dilute your mixture slightly with water. If it’s too pale add a bit more pigment. Testing now saves you from repainting an entire wall later.
Application Technique
This is where limewashing really diverges from traditional painting and mastering the technique is what separates a flat painted-looking wall from an authentic textured limewash finish.
Work in Small Sections
Rather than tackling an entire wall at once, break your work into manageable sections of about 2 to 3 feet at a time. This keeps edges wet enough to blend smoothly into the next section avoiding harsh lines where dry and wet limewash meet.
The X-Stroke Method
Load your natural bristle brush generously and apply the limewash using loose criss-crossing strokes in an X pattern rather than long even rows like you would with regular paint. This irregular motion is what creates limewash’s signature cloudy mottled texture instead of a flat uniform color.
Mist as You Go
Keep a spray bottle of water on hand and lightly mist the wall periodically as you work. This keeps the limewash workable, helps it blend at the edges of each section and reduces the appearance of visible lap marks between areas painted at different times.
Avoid Overworking It
It can be tempting to keep brushing over an area until it looks perfectly smooth but this often flattens out the texture that makes limewash distinctive. Slight unevenness, visible brush marks and soft cloudiness are the goal, not a smooth seamless surface.
Watch Your Pressure
Use light relaxed pressure rather than pressing hard into the wall. Heavier pressure can push too much product into the surface and create blotchy inconsistent patches.
Drying and Curing Between Coats
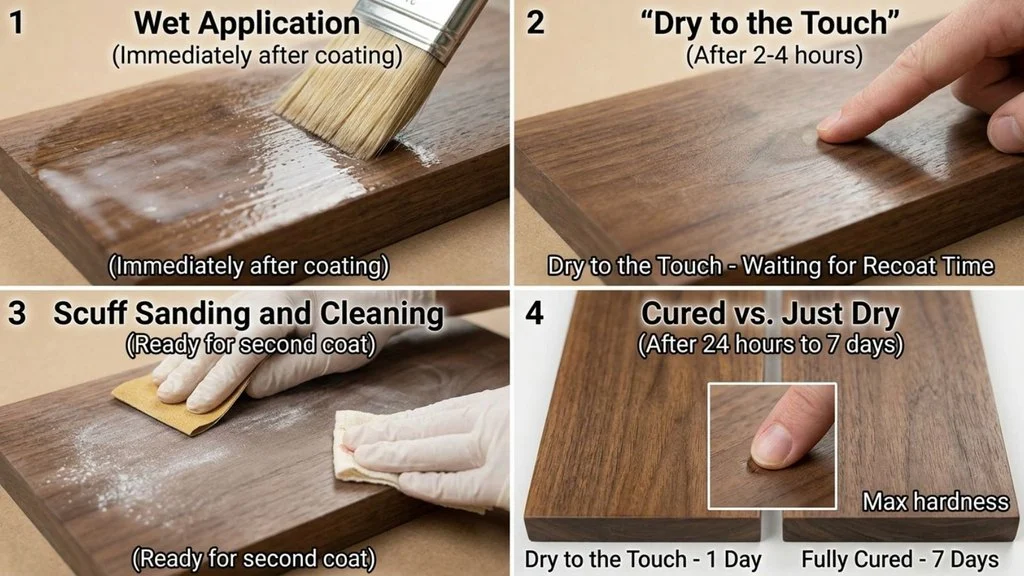
Patience is one of the most underrated skills in limewashing and understanding the difference between “dry” and “cured” will save you from a lot of unnecessary frustration.
Dry Time vs. Cure Time
Limewash typically feels dry to the touch within 4 to 6 hours but that’s not the same as being fully cured. A full cure at the point at which the carbonation process has really taken hold and the lime has bonded with the wall can take up to 24 hours or longer. Applying a second coat before the first has properly cured can disturb the finish or prevent proper bonding between layers.
Why the First Coat Looks Rough
Don’t panic if your first coat looks patchy, chalky or inconsistent once it dries. This is completely normal and expected. The first coat is essentially a base layer and it’s the subsequent coats that build up the depth richness and even coverage that make the final result look intentional rather than unfinished.
Environmental Factors
Humidity temperature and airflow all affect how limewash cures. Higher humidity slows down the carbonation process while good ventilation and moderate temperatures help it along. Avoid painting in extremely cold conditions as the chemical reaction limewash depends on slows significantly below certain temperatures.
Resist the Urge to Rush
It can be tempting to speed through coats to finish the project faster but rushing dry time is one of the most common causes of streaky uneven or patchy final results.
Building Up Coats
A single coat of limewash rarely tells the full story; it’s the layering process that transforms a patchy first pass into the rich textured finish limewash is known for.
How Many Coats You’ll Need
Most limewash projects require two to three coats for full coverage , though this can vary depending on your wall’s porosity, the pigment intensity and how thin your mixture is. Darker colors and more porous surfaces sometimes require an additional coat to reach the desired depth.
How Coverage Changes With Each Layer
The first coat often looks thin, uneven and slightly chalky which can feel discouraging if you’re not expecting it. The second coat starts to fill in those inconsistencies deepening the color and smoothing out some of the patchiness. By the third coat most walls reach a rich cohesive look with the characteristic soft variation limewash is prized for rather than looking unfinished or splotchy.
Adjusting Technique for the Final Coat
Your final coat is a good opportunity to fine-tune the finish to your taste. If you want a more textured rustic look keep using bold visible X-strokes. If you’d prefer something a bit smoother and more subtle you can lighten your brush pressure and blend more thoroughly on this last pass while still avoiding the flat uniformity of standard paint.
Let Each Coat Fully Cure
As tempting as it is to move quickly between coats, give each layer its full drying and curing time before starting the next to avoid disturbing the bond underneath.
Sealing and Protecting Limewash (Optional)
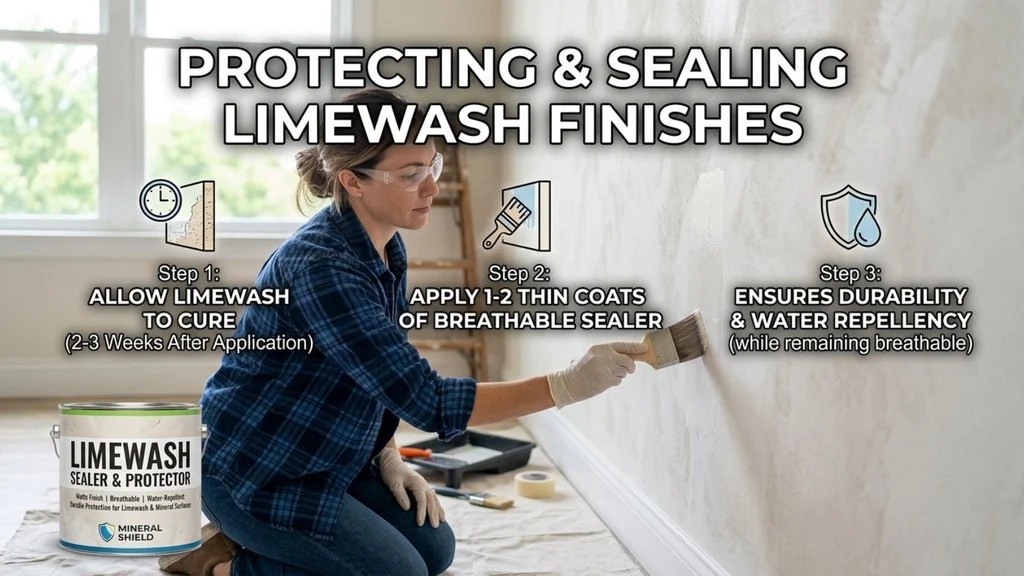
Sealing isn’t always necessary with limewash but in the right circumstances it can add durability without sacrificing the finish’s natural character.
When Sealing Makes Sense
High-moisture areas like kitchens, bathrooms and laundry rooms benefit most from a sealer since limewash on its own isn’t especially water-resistant. High-traffic zones such as hallways or spaces near doorways where walls get bumped or brushed against frequently are also good candidates for a protective topcoat.
Choosing the Right Sealer
Not all sealers are compatible with limewash. Look specifically for matte breathable sealers designed for lime-based or mineral finishes. Standard acrylic sealers or glossy topcoats can trap moisture underneath the limewash interfering with its natural breathability and potentially causing bubbling peeling or discoloration over time.
How Sealing Affects the Look
A good breathable sealer should have minimal impact on the appearance of your limewash preserving the soft matte texture rather than making it look shiny or plasticky. That said, it’s worth testing the sealer on a small area first since some products can slightly deepen or alter the color once applied.
Timing Matters
Don’t rush to seal a freshly finished wall. Limewash needs several days sometimes up to a week to fully cure before a sealer is applied. Sealing too early can trap moisture in the wall and disrupt the carbonation process that gives limewash its strength and characteristic look.
Troubleshooting Common Problems
Even with careful prep and technique limewashing can throw a few curveballs. Here’s how to recognize and fix the most common issues.
Streaky or Uneven Color
This usually points to inconsistent mixing uneven brush pressure or working in sections that are too large. Stir your mixture frequently, keep sections small and use consistent X-strokes throughout to even things out. An additional coat can also help blend inconsistencies.
Visible Lap Marks
Hard edges where wet and dry limewash meet typically happen when sections dry before you can blend into them. Working faster keeping sections smaller and misting the wall’s edges with water before continuing can help prevent this.
Chalky Residue or Rub-Off
Some initial chalkiness is normal but excessive rub-off (sometimes called “dusting”) often signals the lime didn’t cure properly usually due to poor ventilation, low humidity or cold temperatures during application. In some cases a light misting with water can help reactivate and re-bond the surface.
Color Drying Much Lighter Than Expected
This is one of the most common surprises for beginners and it’s simply how limewash behaves as it cures. If the color is too pale even after full curing an additional coat with slightly more pigment can deepen it.
Cracking or Flaking
This is typically a sign of underlying surface issues such as inadequate prep applying limewash too thickly or bonding failure on a non-porous surface. Correcting the root cause usually means stripping back to the bare wall and redoing prep steps properly.
Caring for Limewashed Walls
Once your limewash has fully cured, ongoing care is fairly simple but it does require a gentler approach than you’d use on standard painted walls.
Everyday Cleaning
For routine dusting a soft dry microfiber cloth or a duster is usually all you need. Limewash’s matte slightly textured surface tends to show dust more than glossy paint so light regular dusting keeps walls looking fresh.
Damp Cleaning
For occasional deeper cleaning a barely damp cloth can be used but avoid soaking the wall or scrubbing aggressively. Because limewash is more porous and less water-resistant than standard paint, excess moisture can cause streaking, softening or even removal of the finish in unsealed areas.
What to Avoid
Skip harsh chemical cleaners, abrasive sponges and anything with bleach as these can strip pigment or damage the lime’s surface. Avoid pressure washing exterior limewashed walls as well since the force can erode the finish over time.
Touch-Ups
Minor scuffs or scratches can often be touched up by reapplying a small amount of the original limewash mixture directly to the affected area blending with the same X-stroke technique used in the original application. Keeping a small amount of your mixed color on hand (or notes on your pigment ratio) makes future touch-ups much easier to match.
Expected Lifespan
With proper care limewash can last many years though high-traffic or high-moisture areas may need refreshing sooner, sometimes every 5 to 10 years depending on wear and environmental exposure.
Design Tips and Color Ideas
Limewash’s soft organic texture makes it incredibly versatile but choosing the right color and application approach can make a big difference in how the final result feels in your space.
Popular Color Palettes
Warm off-whites and creamy neutrals remain the most popular limewash choices echoing the classic European plaster look. Soft greys and greiges offer a more modern minimalist feel while earthy terracottas and warm ochres lean into a Mediterranean or Southwestern aesthetic. Muted sage greens and dusty blues have also become popular for adding a subtle organic pop of color without feeling overly bold.
Pairing With Other Materials
Limewash tends to pair beautifully with natural textured materials. Exposed wood beams, wide-plank flooring and rattan or wicker furniture complement its earthy quality. Exposed brick or stone accents alongside a limewashed wall can create a layered textural contrast. Matte black or aged brass fixtures also tend to stand out nicely against limewash’s soft cloudy backdrop.
Accent Wall vs. Whole Room
A single accent wall is a great way to test limewash without committing to a full room and it works particularly well behind a bed fireplace or dining area. For a more immersive look full-room application creates a cohesive enveloping feel especially effective in bathrooms entryways or living rooms with good natural light.
Layering Tones for Depth
Some homeowners apply two subtly different but complementary shades in the final coats layering a slightly darker or lighter tone over the base color. This technique adds extra dimension and makes the cloudy variegated effect even more pronounced.
Cost Considerations
Limewash sits in an interesting middle ground cost-wise the materials themselves aren’t necessarily expensive but the labor and time investment can add up depending on how you approach the project.
DIY Cost Breakdown
Limewash paint typically costs more per gallon than standard interior paint particularly for pre-mixed pigmented versions from specialty brands. Powdered limewash tends to be more budget-friendly though it requires more effort to mix and prepare. Beyond the paint itself you’ll need to budget for a natural bristle brush mineral primer if you’re working on drywall and basic prep supplies like sandpaper patching compound and drop cloths. Altogether a DIY limewash project is often comparable to or slightly higher than a standard paint job once specialty materials are factored in.
Cost vs. Hiring a Professional
Because limewash requires specific technique and experience to get right many homeowners opt to hire a professional especially for large or highly visible spaces. Professional limewash application costs significantly more than DIY since it accounts for both the specialty materials and the labor-intensive multi-coat process. For smaller accent walls or budget-conscious projects DIY remains the more economical route provided you’re willing to invest the time in prep and practice.
Cost Comparison to Standard Paint
Overall limewash tends to cost more than a basic paint job whether DIY or professional due to specialty materials, additional coats and longer application time. However many homeowners consider the unique long-lasting texture worth the premium compared to flat easily-scuffed standard paint finishes.
Safety Considerations
Limewash is a natural mineral-based product but that doesn’t mean it’s completely risk-free to work with. A few precautions will keep your project safe from start to finish.
Handling Lime Safely
Before it fully cures lime is caustic meaning it can irritate or burn skin and eyes on contact. Always wear rubber gloves while mixing and applying limewash and avoid touching your face or eyes during the process. If lime does come into contact with skin, rinse the area thoroughly with water right away.
Eye and Respiratory Protection
Eye protection is essential especially when mixing powdered limewash as airborne particles can easily irritate the eyes. If you’re working with powder or in a poorly ventilated space a basic respirator or dust mask can help prevent inhaling fine lime particles which can irritate the respiratory system.
Ventilation
Good airflow isn’t just about comfort it also helps the limewash cure properly. Open windows and use fans where possible both to protect yourself from fumes and dust and to support the carbonation process that gives limewash its strength.
Protecting Skin and Clothing
Long sleeves and pants are a good idea in addition to gloves since prolonged skin contact with wet limewash can cause irritation over time. Old clothing is recommended as limewash can be difficult to fully remove from fabric once dried.
Disposal
Leftover limewash shouldn’t be poured down household drains as its high pH can affect plumbing and water systems. Check local guidelines for proper disposal of lime-based products.
FAQ Section
Can I limewash over painted walls?
Generally no not without extra prep. Limewash needs a porous surface to bond with glossy or previously painted walls (especially oil-based paint) typically need to be sanded, stripped or primed with a breathable mineral primer before limewash will adhere properly.
How long does limewash last?
With proper application and care limewash can last many years, often a decade or more in low-traffic low-moisture areas. High-traffic zones or spaces exposed to moisture may need refreshing sooner sometimes every 5 to 10 years.
Is limewash waterproof?
No limewash is not waterproof on its own. It’s breathable and moisture-permeable which is great for preventing trapped damp in older walls but it isn’t designed to resist direct water exposure. For bathrooms, kitchens or other moisture-prone areas a breathable sealer is recommended.
Can I limewash outdoors?
Yes limewash has a long history of exterior use on stucco brick and masonry particularly in Mediterranean and European architecture. Exterior applications may need periodic refreshing due to weather exposure but the porous breathable nature of limewash actually suits many exterior masonry surfaces well.
Does limewash need to be resealed?
Not always. Many interior limewash walls are left unsealed to preserve their natural texture and breathability. However in high-moisture or high-traffic areas resealing every few years with a breathable matte sealer can help extend the finish’s lifespan without compromising its look.
Conclusion
Lime washing your walls is a project that rewards patience over perfection unlike standard paint where the goal is flawless, even coverage lime wash asks you to embrace a bit of unpredictability.
The soft clouding subtle brush marks and gentle variation from one section to the next aren’t flaws to correct but the very qualities that make this finish so distinctive.
If you’ve made it through this guide you now have a solid understanding of what lime wash actually is, why it behaves so differently from paint, which surfaces work best and how to prep, mix , apply and care for it properly.
You also know how to troubleshoot the most common hiccups from streaky color to visible lap marks so you’re not left guessing if something doesn’t look right on your first attempt.