If you’ve ever tried cutting porcelain tile the same way you’d cut ceramic you’ve probably learned the hard way that porcelain plays by different rules.
It’s denser, harder and far less porous than ceramic which is exactly what makes it so durable underfoot and exactly what makes it prone to cracking, chipping or shattering under the wrong blade or technique.
Where a snap cutter might glide through a ceramic tile porcelain often fights back especially on thicker or rectified tiles with sharp precise edges.
The good news is that with the right tools and a little patience cutting porcelain doesn’t have to be a gamble. Whether you’re making simple straight cuts for a floor layout notching around an outlet or drilling a clean hole for a pipe there’s a method suited to the job.
This guide walks through every major cutting technique, the tools you’ll need and how to avoid the most common mistakes so your cuts come out clean the first time.
Understanding Porcelain Tile Before You Cut
Before you make a single cut it helps to understand what you’re actually working with because not all porcelain tile behaves the same way under a blade.
Glazed vs. unglazed (full-body) porcelain is the first distinction to know. Glazed porcelain has a hard ceramic coating baked onto the surface which can chip if the blade catches it wrong. Unglazed or full-body porcelain is the same material all the way through so it tends to cut more predictably but it’s often denser and harder on your blade.
Rectified vs. non-rectified edges matters for layout as much as cutting. Rectified tiles are precision-cut at the factory for tight uniform grout lines so any cuts you make need to match that same crispness and sloppy cuts stand out more. Non-rectified tiles have slightly rounded factory edges and a bit more forgiveness.
Thickness plays a direct role in tool choice. Thin porcelain (around 3/8″) cuts easily with most wet saws while thicker tile, especially 3/4″ pavers or porcelain slabs, demands a more powerful saw and a slower feed rate to avoid cracking.
Finally take a moment to look at pattern and grain direction especially with wood-look or stone-look porcelain. Planning your cuts so the pattern flows naturally across tiles makes a real difference in the finished look particularly on visible edges near doorways or focal walls.
Tools and Materials Overview
Having the right tools on hand before you start makes the difference between a clean cut and a cracked tile.
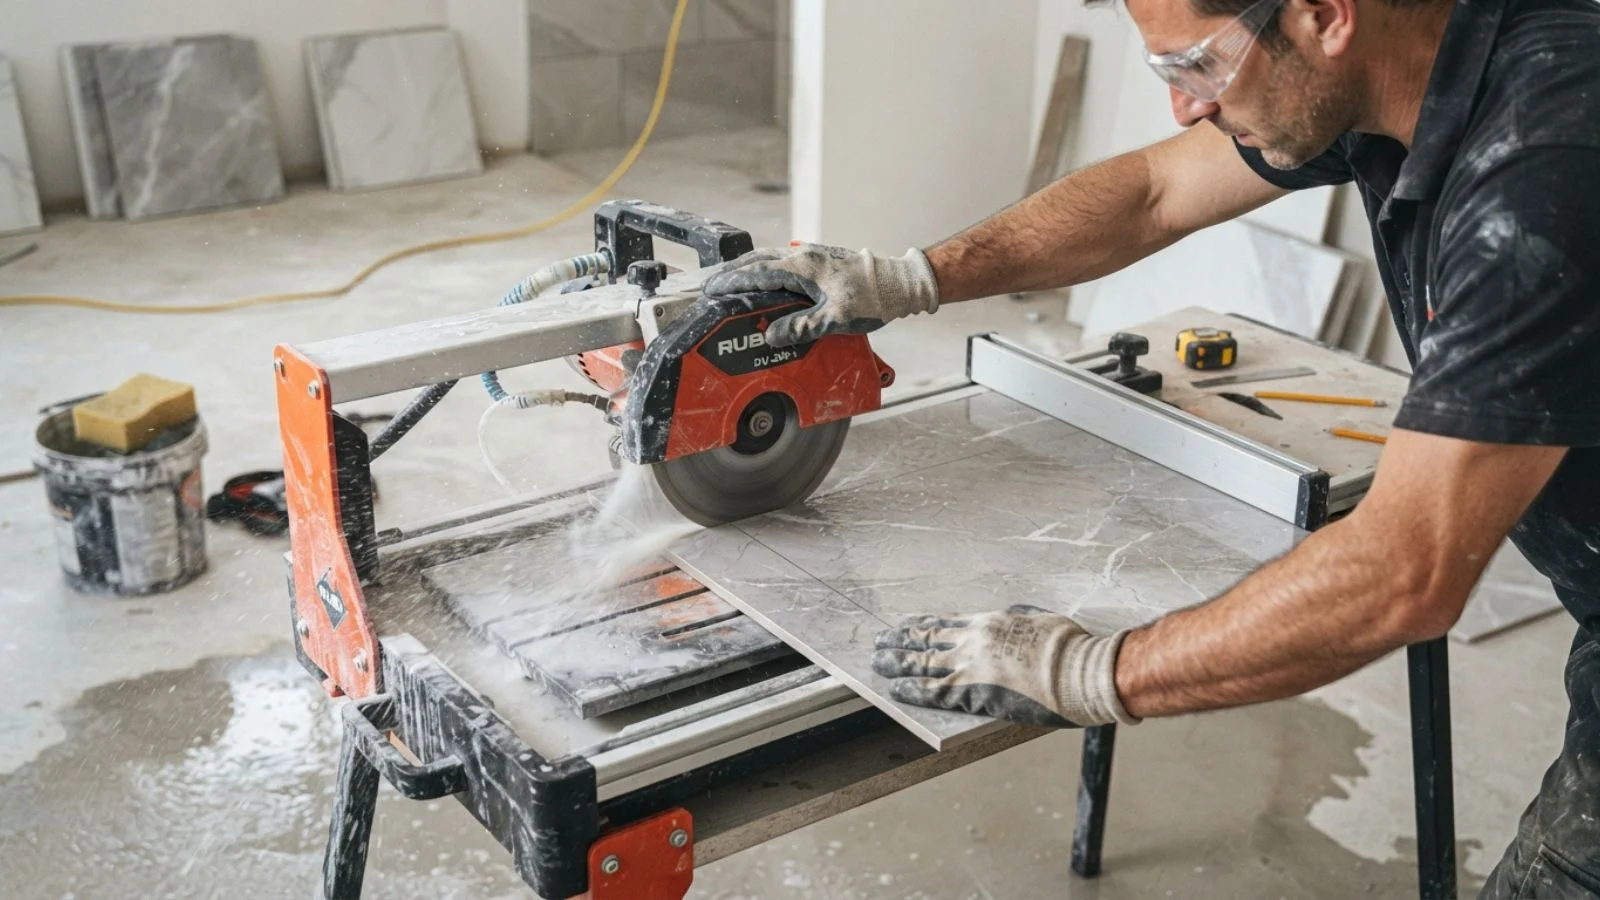
A wet tile saw is the workhorse for most porcelain cutting jobs. It uses a water-cooled diamond blade to make straight precise cuts with minimal chipping. If you only have a small project renting one for the day is often more practical than buying.
A manual snap/score cutter works for simple straight cuts on thinner tile though it demands more precision and pressure with porcelain than with ceramic.
For irregular shapes an angle grinder fitted with a diamond blade lets you cut curves, L-shapes and notches freehand essential for fitting tile around corners outlets or cabinetry.
A diamond hole saw is purpose-built for clean round cutouts needed for pipes, shower valves or other fixtures.
Tile nippers come in handy for small adjustments and nibbling away material where a full cut isn’t practical.
For marking use a grease pencil or wax pencil rather than a regular pencil it shows up clearly on glazed surfaces and won’t rub off during handling. Pair this with a square and tape measure for accuracy.
Finally don’t skip PPE: safety glasses gloves a dust mask or respirator rated for silica dust and hearing protection for power tools. A diamond hand pad is also worth having for smoothing edges after cutting and a spray bottle helps keep dry cuts cooler and less dusty.
Preparing to Cut
Good preparation prevents most of the mistakes that ruin a porcelain cut. Rushing this stage is where most cracked tiles and misaligned layouts begin.
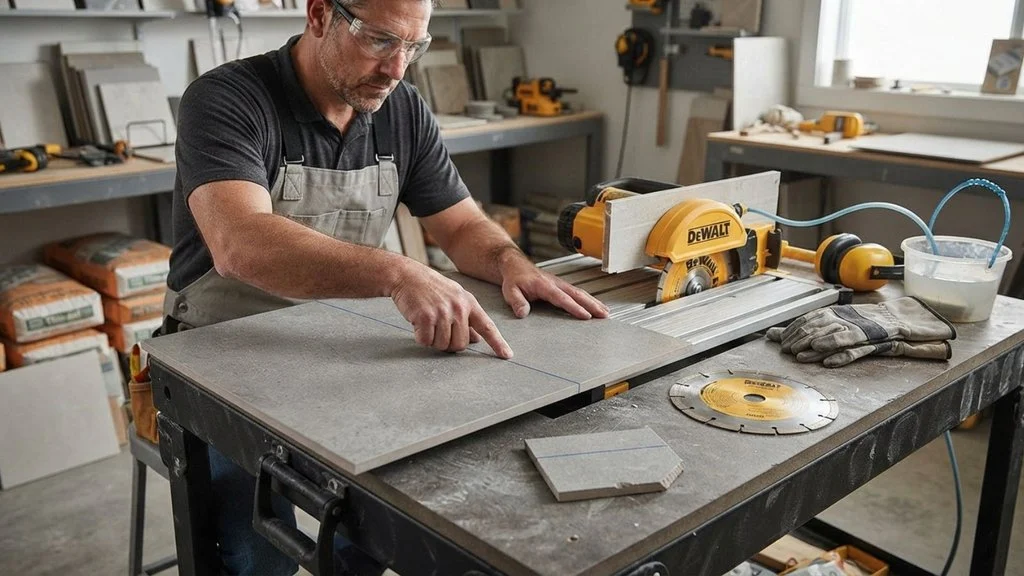
Start with accurate measuring and marking. Measure twice before committing to a cut porcelain doesn’t forgive a re-cut the way ceramic sometimes does since a second attempt often means starting with a fresh tile. Use a grease pencil on the glazed surface so your line stays visible throughout the cut.
Don’t forget to account for grout line spacing in your measurements. It’s easy to measure the gap itself and forget to subtract it from the tile size which throws off the whole layout once several tiles are in place.
Before cutting anything it’s worth dry-fitting your tiles in the layout first. Lay out a full row or section without adhesive to confirm spacing pattern alignment and where cuts will actually fall. This catches layout problems while they’re still easy to fix.
Setting up a stable level cutting station or a wobbly table or uneven surface is a common cause of wandering cuts especially with a wet saw or grinder. Make sure the saw itself is on a flat surface and firmly positioned before you start.
Finally if you’re using a wet saw take a moment to fill the water reservoir and check that the pump is circulating water to the blade and inspect the blade for wear or damage. A dry or dull blade is one of the fastest ways to chip or crack porcelain.
Straight Cuts with a Wet Saw
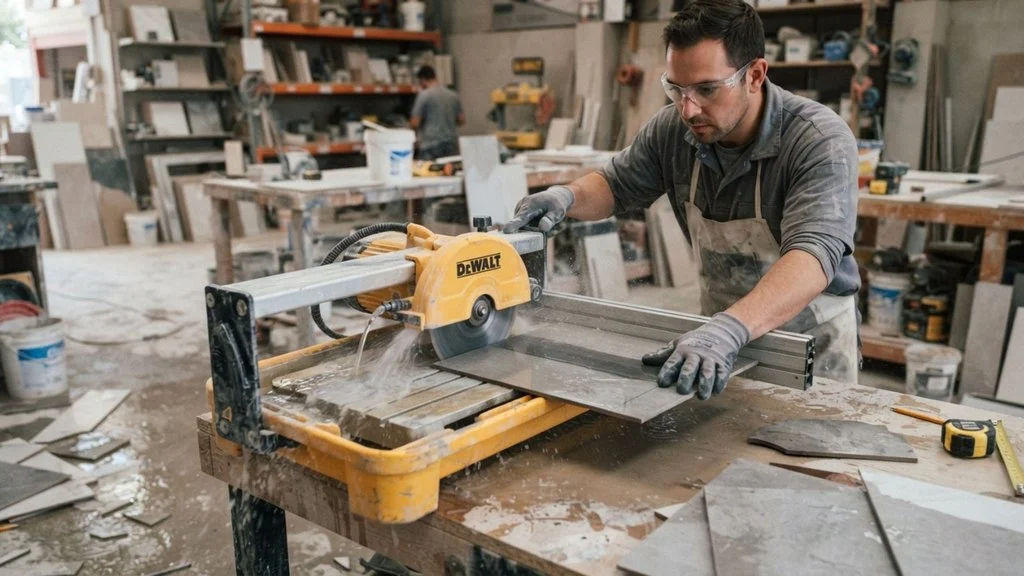
A wet saw is the most reliable tool for straight cuts in porcelain and for most home projects it should be your first choice. The water keeps the diamond blade cool, reduces friction and washes away debris all of which minimizes the chipping and cracking porcelain is prone to under dry high-heat cutting.
Start by measuring and marking your cut line on the front glazed side of the tile using a grease pencil. Double-check the measurement against your layout before cutting.
Next align the tile with the blade using the saw’s fence or guide to keep your mark exactly in line with the blade path. Confirm the water reservoir is full and the pump is running before you begin. The blade should stay wet throughout the entire cut, not just at the start.
Feed the tile into the blade slowly and steadily. This is the step where most mistakes happen: pushing too fast generates heat, stresses the tile and often results in chipped edges or a bogged-down motor. Let the blade’s speed do the cutting work rather than forcing the tile through.
As you approach the end of the cut support both sides of the tile so the offcut doesn’t snap away unevenly and chip the edge.
Once cut, inspect the edge. A wet saw typically leaves a smooth usable edge but if it feels sharp or slightly rough a quick pass with a diamond hand pad will clean it up before installation.
Straight Cuts with a Manual Snap Cutter
A manual snap cutter sometimes called a score-and-snap cutter is a budget-friendly alternative to a wet saw and it works well for straightforward one-time projects where renting or buying a wet saw doesn’t make sense.
Begin by marking your cut line clearly on the tile’s glazed surface. Place the tile in the cutter with your mark aligned precisely under the scoring wheel. Accuracy here matters more than it does with a wet saw since you won’t get a second pass to correct the line.
Score the tile in a single firm continuous pass applying even pressure from one edge to the other. Avoid the temptation to go back over the line multiple times; this weakens the score and makes an unpredictable break more likely rather than less.
Once scored, use the cutter’s built-in snapping mechanism or apply firm even downward pressure on both sides of the score line to break the tile cleanly in two.
It’s worth being upfront about the limitations here: porcelain is significantly denser than ceramic so it takes considerably more pressure to score deeply enough for a clean snap. It’s also more prone to breaking unpredictably along hairline flaws rather than your intended line especially on thicker or rectified tile.
For small simple budget-conscious projects a snap cutter can get the job done. But for anything involving thicker porcelain a large volume of cuts or precision-critical rectified edges a wet saw remains the more dependable choice.
Curves L-Cuts and Notches with an Angle Grinder
Straight-cutting tools can’t handle every situation; tile often needs to wrap around corners, door frames or electrical outlets and that’s where an angle grinder fitted with a diamond blade becomes essential. It offers the freehand control needed for irregular shapes that a wet saw or snap cutter simply can’t produce.
Start by marking the full cutout shape directly on the tile with a grease pencil tracing the exact outline you need to remove. Take extra care here since freehand cuts leave less room for error than guided ones.
Rather than trying to cut the entire shape in one pass use the relief-cut technique: make a series of small straight cuts up to your marked line effectively scoring the waste material into sections. This breaks a complex shape into manageable pieces and reduces stress on the tile.
Once the relief cuts are in place carefully grind away the waste material in small sections working from the outer edge inward. Removing material gradually rather than trying to force the whole shape at once helps prevent cracks from spreading into the section you’re keeping.
Work in short controlled passes letting the grinder and tile cool between cuts grinding generates significant heat and dust and porcelain is especially sensitive to thermal stress. A spray bottle of water nearby helps keep both the blade and tile temperature down.
Once the shape is cut smooth any rough or sharp edges with a diamond hand pad before test-fitting the piece.
Round Holes for Pipes and Fixtures

Cutting a clean round hole in porcelain for a shower valve pipe or other fixture calls for a diamond hole saw rather than any of the straight-cutting methods. It’s purpose-built to bore through hard dense material without shattering the surrounding tile.
Start by marking the exact center point of the hole on the tile along with the outer diameter if precision matters for your fixture fit. Double-checking this measurement against the actual pipe or fixture before cutting porcelain doesn’t forgive a hole cut in the wrong spot.
When you begin cutting, start the hole saw at a low shallow angle rather than straight down. This lets the diamond rim “notch” through the glaze gradually instead of skating across the smooth surface which is the most common cause of a wandering off-center hole. Once the bit has bitten into the tile and established a groove slowly bring the drill upright to continue the cut vertically.
Throughout the process keep the cutting area wet. If you’re not using a wet saw setup a spray bottle or a wet sponge held near the bit works well to control both heat and dust as you drill.
Cut at a slow steady speed rather than pushing hard or fast. Porcelain’s hardness means that rushing the cut generates excess heat and pressure which is far more likely to crack the tile outright than to speed up the hole.
Small Adjustments with Tile Nippers
Not every cut calls for a power tool. For minor edge adjustments small notches or irregular nibbling along an edge tile nippers are often faster and safer than firing up a wet saw or grinder provided you know when they’re actually the right tool for the job.
Nippers work best for small incremental removals not full cuts. Trying to nip your way through a large section of tile is slow, unpredictable and far more likely to crack the piece than to save you time. Reach for nippers when you need to shave off a sliver along an edge round a corner slightly or clean up a rough spot left by another cutting method.
The technique itself matters more than it might seem. Rather than trying to remove a large bite in one squeeze, take small controlled nibbles along the edge working gradually toward your line. Positioning the nippers so only a small amount of material is between the jaws at each bite biting too much at once is the most common way to crack the tile beyond your intended line.
Nippers are especially useful for finishing touches around irregular openings like the edge of a pipe cutout that a hole saw got close to but not exact or for tidying up a grinder-cut notch that needs a slightly tighter fit.
Keep in mind that nipped edges are rarely as clean as a saw or grinder cut so they’re best reserved for spots that will be covered by trim grout or a fixture cover plate rather than fully exposed edges.
Finishing Cut Edges
A clean cut isn’t quite finished until the edge is properly smoothed and checked. This final step is easy to skip but makes a noticeable difference in both appearance and safety.
Start by smoothing any sharp or rough edges with a diamond hand pad. Even a well-executed wet saw or grinder cut can leave a slightly sharp lip and freehand grinder cuts especially benefit from a few passes to soften the edge. Work the pad in one direction along the cut checking periodically rather than over-sanding since removing too much material can throw off your fit.
Once smoothed, check the cut against your original layout. Dry-fit the piece back into position to confirm it matches your measurements and sits flush with the surrounding tiles. This is the moment to catch a slightly-off cut before adhesive or grout makes adjustments far more difficult.
If you notice minor chips along the edge don’t assume the piece is ruined. Small chips can often be filed down smooth with the diamond hand pad especially if they’re shallow. For chips that can’t be fully removed, consider whether the affected edge will be hidden under trim grout or an adjoining fixture; many minor imperfections disappear entirely once installation is complete.
For visible edges where appearance matters most such as an outside corner or a cut along a focal wall it’s worth being more selective: if a cut piece has a chip in a highly visible spot it may be worth re-cutting from a fresh tile rather than trying to disguise the flaw.
Common Problems and Troubleshooting
Even with careful technique porcelain cutting comes with a handful of recurring problems. Knowing the likely cause makes them much easier to prevent next time.
Chipped edges are the most common complaint usually caused by cutting too fast using a dull or wrong-type blade or cutting with the glazed side facing down. Slowing your feed rate and always cutting glazed-side-up resolves most chipping issues.
Cracked tile mid-cut typically points to excessive pressure on an unsupported tile (especially near the end of a cut) or thermal stress from a dry or overheated blade. Supporting both sides of the tile through the entire cut and keeping the blade wet are the most effective preventive steps.
A blade that wears out quickly or burns the tile is often a sign of the wrong blade type for porcelain’s density, insufficient water flow or feeding the tile too aggressively. A continuous-rim diamond blade rated for porcelain paired with steady water flow solves this in most cases.
A wandering hole saw cut almost always comes from starting the drill straight down instead of at a shallow angle first. Re-starting the hole at a low angle to notch the glaze before going vertical prevents the bit from skating.
Uneven snap breaks with a manual cutter usually mean the score line wasn’t deep or consistent enough or the tile was scored in more than one pass. A single firm continuous score with even pressure the full length of the tile gives the cleanest break.
Safety Considerations

Cutting porcelain tile isn’t just about getting a clean edge it also involves real hazards that are easy to underestimate especially on a home project where proper safety gear can feel like overkill.
The most significant risk is silica dust exposure. Porcelain like most tile contains crystalline silica and cutting it especially dry with a grinder or hole saw releases fine particles that are harmful to breathe over time. Always wear a properly rated dust mask or respirator (not just a basic paper mask) when dry-cutting and favor wet-cutting methods whenever possible since water dramatically reduces airborne dust.
If you’re using a wet saw, be mindful of the combination of water and electricity. Make sure the saw is properly grounded plugged into a GFCI-protected outlet and that cords and connections stay clear of standing water. Never operate the saw with wet hands touching the plug or switch.
For grinding or any dry cutting work in a well-ventilated area outdoors or in a garage with the door open is ideal since dust and heat both build up quickly in enclosed spaces.
Eye protection should be worn for every cutting method not just power tools; even a manual snap cutter can send small shards flying. Pair this with gloves to protect against sharp edges and hearing protection for any prolonged use of a wet saw or grinder both of which run loud enough to cause damage over an extended project.
Blade and Tool Selection Cheat Sheet
Choosing the right blade is often the single biggest factor in whether a porcelain cut comes out clean or chipped even more so than technique. Here’s how the main options compare.
Continuous rim diamond blades have a smooth unbroken edge and are the best choice for porcelain specifically. They produce the cleanest smoothest cuts with minimal chipping which matters most on visible edges. The trade-off is a slightly slower cutting speed compared to segmented blades.
Segmented diamond blades have gaps cut into the rim which allows for faster cutting and better debris clearance. They’re better suited to harder materials like stone or concrete but on porcelain they tend to leave a rougher, more chip-prone edge, generally not the first choice unless speed matters more than finish quality.
Turbo blades sit in between: a serrated semi-continuous edge that cuts faster than a continuous rim blade while leaving a cleaner edge than a fully segmented one. They can work reasonably well on porcelain but still aren’t as clean as a true continuous rim blade.
Wet-rated vs. dry-rated blades matters just as much as the rim type. Wet blades are designed to run cool with water and will overheat quickly if used dry. Dry-rated blades are built to handle heat without water but generally can’t match the edge quality of a wet-cut with a continuous rim blade.
Finally, always confirm blade diameter compatibility with your specific saw or grinder before buying an undersized or oversized blade that won’t fit the arbor or guard correctly and running one is a real safety hazard.
Tips for Professional-Looking Results

The difference between an amateur-looking cut and a professional one often comes down to a handful of habits rather than expensive equipment.
Practice on scrap tile first especially before tackling curves notches or holes. Porcelain behaves differently from ceramic and even experienced DIYers benefit from a test cut to dial in feed speed and pressure before committing to a tile that’s actually going in the layout.
Always cut with the glazed side facing up whether you’re using a wet saw or a snap cutter. The blade or scoring wheel exits through the underside of the tile and cutting glazed-side-up means any minor chipping happens on the unglazed back, not the visible finished surface.
Let the blade do the work. This principle applies across every power tool method in this guide. Forcing the tile through a cut pushing too hard or too fast is consistently the top cause of chips cracks and burned blades. A slower steadier feed almost always produces a better result than rushing.
Keep everything wet whenever the method allows it. Water isn’t just about blade longevity; it directly reduces the heat and friction that cause porcelain to crack or chip in the first place. Even for grinder work that can’t use a full wet saw setup a spray bottle nearby makes a meaningful difference.
Finally take your time on layout before you ever pick up a tool. Many “bad cuts” are actually the result of rushed measuring rather than poor cutting technique. A few extra minutes of planning saves far more time than it costs.
Frequently Asked Questions
Can you cut porcelain tile without a wet saw?
Yes though results vary by method. A manual snap cutter works for simple straight cuts on thinner tile and an angle grinder with a diamond blade handles curves and notches without a wet saw. The trade-off is more dust, more heat and a higher chance of chipping so wet-cutting methods or a spray bottle for cooling are strongly recommended if you skip the wet saw.
What blade is best for porcelain?
A continuous rim diamond blade is the best all-around choice. Its smooth unbroken edge produces the cleanest cuts with the least chipping which matters most for visible edges. Segmented and turbo blades cut faster but generally leave a rougher finish on porcelain specifically.
Why does porcelain tile crack when cutting?
Cracking is usually caused by excessive pressure on an unsupported tile, a dry or overheated blade or feeding the tile too quickly. Porcelain’s density means it doesn’t tolerate rushed cuts the way softer ceramic does, slowing down and keeping the blade cool with water are the most effective fixes.
Can you cut porcelain with a regular circular saw?
Not effectively and it’s not recommended. A standard circular saw blade isn’t designed to cut through porcelain’s hardness and will dull almost immediately, often cracking the tile rather than cutting it cleanly. A diamond blade whether on a wet saw grinder or specialty circular saw attachment is necessary.
Do you need a diamond blade for porcelain?
Yes. Porcelain’s hardness requires a diamond-coated blade regardless of the tool standard; abrasive or carbide blades wear out quickly and produce poor chip-prone cuts.
Conclusion
Cutting porcelain tile well comes down to matching the right method to the job and giving the material the patience it demands.
For straight cuts a wet saw remains the most reliable option delivering clean chip-free edges thanks to its water-cooled diamond blade while a manual snap cutter can handle simpler straight cuts on a tighter budget.
For curves L-shapes and notches an angle grinder with a diamond blade gives you the freehand control that straight-cutting tools can’t offer and a diamond hole saw is the go-to for clean round cutouts around pipes and fixtures.
Tile nippers round out the toolkit for small precise adjustments that don’t call for a full power tool.
Across every method the same principles hold true: cut with the glazed side up, keep the blade wet whenever possible, let the tool do the work rather than forcing it and take the time to measure and dry-fit before committing to a cut.
These habits matter more than any single tool purchase and they’re what separate clean professional-looking results from cracked tiles and wasted material.