There’s something deeply satisfying about bringing an old kitchen table back to life or maybe you scored a solid wood table secondhand that just needs a little love to shine again.
If the story, refinishing beats replacing almost every time it’s kinder to your wallet kinder to the planet and it lets you keep a piece of furniture with real character instead of settling for flat-pack sameness.
Refinishing isn’t just wiping on a fresh coat of polish. Done right it means stripping away years of wear repairing the damage underneath and rebuilding a finish that can stand up to daily family life.
It sounds like a big job but with the right tools and a little patience it’s absolutely a weekend-to-week-long project you can tackle yourself. Here’s exactly how.
Assessing Your Table

Before you buy a single supply take time to really look at your table. The first step is identifying what you’re working with. Flip it over or check underneath for a wood grain pattern that runs consistently through the material that’s solid wood. If you see a thin layer with a different grain pattern peeking through at the edges or corners you’re likely dealing with veneer which needs a much gentler touch since sanding through it is easy to do and hard to fix. Laminate meanwhile isn’t real wood at all and generally can’t be refinished the traditional way painting or replacing the surface are your best options there.
Next figure out what finish is currently on the table. A quick test: dab a cotton ball with denatured alcohol and rub a hidden spot. If the finish softens or comes off you’re likely dealing with shellac or a water-based finish. Try acetone next. If that dissolves it, it’s probably lacquer. No reaction to either usually means polyurethane or varnish which are more durable and require sanding or stripping rather than dissolving.
Finally take stock of the damage. Are you looking at surface-level scratches and dullness or deeper issues like water rings burns dents loose joints or warping? This assessment determines your whole approach: a light sand-and-recoat for minor wear or a full strip-down for a table that’s seen serious life.
Tools & Materials Checklist
Before diving in, gather everything so you’re not mid-project making an emergency hardware store run. Start with safety gear, a respirator mask (not just a dust mask especially if stripping chemically) , safety goggles, nitrile gloves and a well-ventilated space or open garage door.
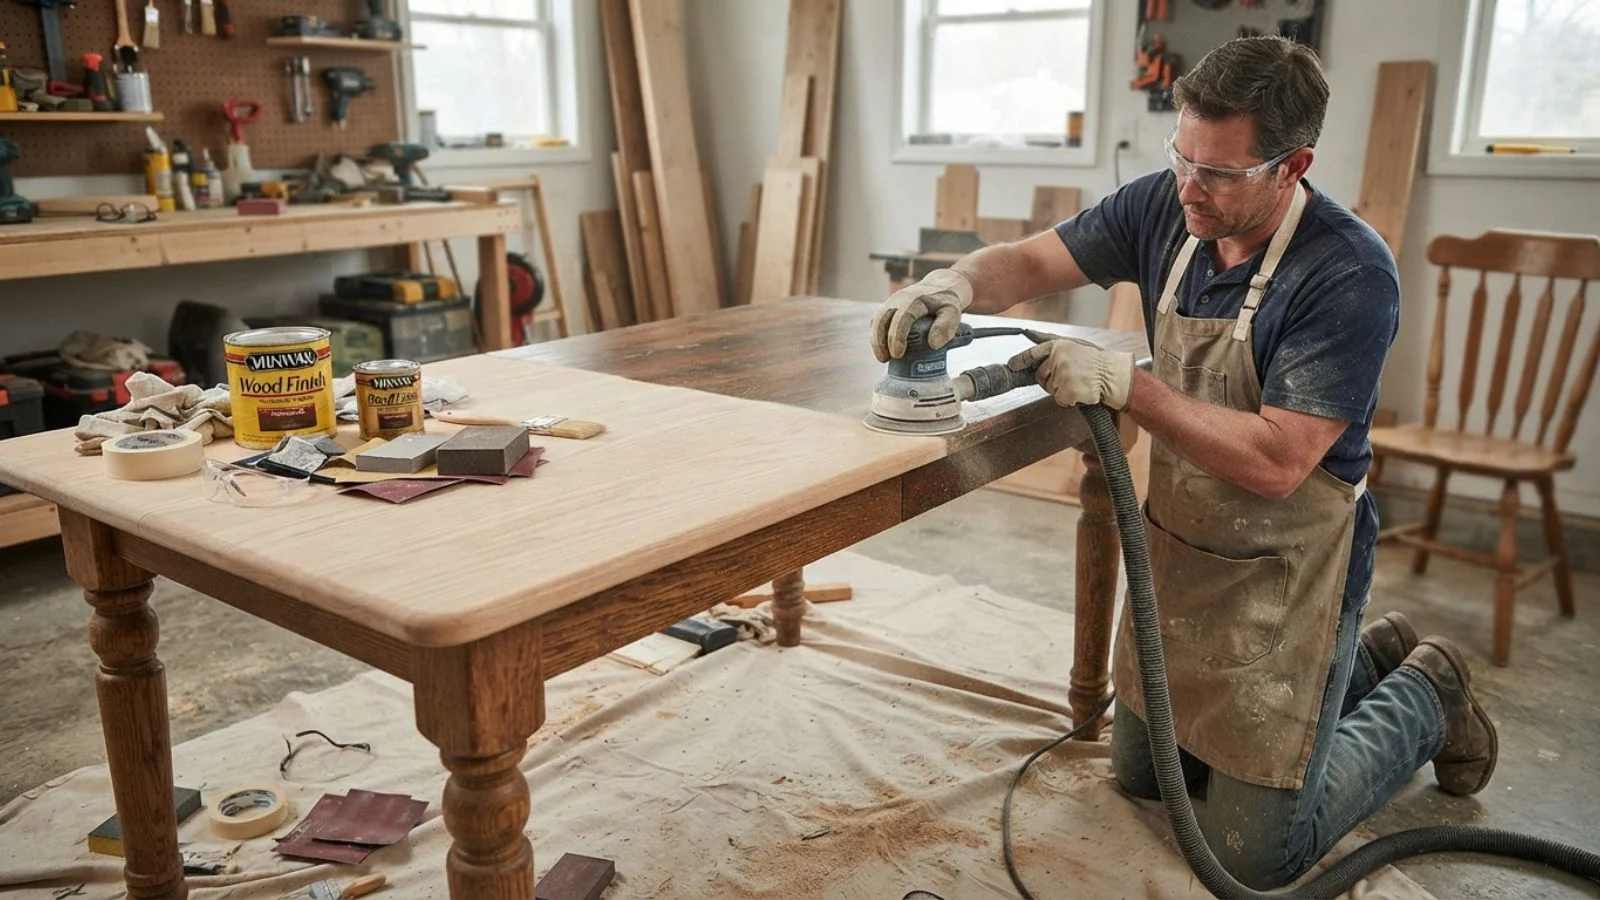
For sanding you’ll want an orbital sander for larger flat surfaces plus sandpaper in a range of grits 80 or 100 for initial stripping-stage sanding working up to 150 then 220 for a smooth final surface. Keep a sanding block and some folded paper on hand for edges, legs and detail work your sander can’t reach.
If you’re chemically stripping, pick up a quality stripper, a plastic or metal scraper and some steel wool or synthetic wool pads for corners and carved details. Mineral spirits and tack cloths are essential for cleanup between steps dust left behind ruins a finish fast.
For repairs keep wood filler or epoxy putty wood glue and a couple of clamps on hand for loose joints or gaps.
Finally your finishing supplies: stain if you’re changing or refreshing the color, a pre-stain conditioner if working with blotch-prone wood like pine and your topcoat of choice polyurethane varnish oil or wax along with quality brushes, foam applicators or lint-free rags.
Lay down drop cloths, set up sawhorses if you can and make sure your lighting is bright enough to catch every missed spot.
Preparing the Workspace

A little setup now saves a lot of frustration later so don’t skip this step even if you’re eager to get started. First decide where you’ll actually work. A garage basement or covered outdoor space with good airflow is ideal especially if you’re using chemical strippers or oil-based finishes the fumes are strong and linger. If you’re stuck working indoors, open windows, run fans to move air out (not just around) and consider a box fan in a window to actively exhaust fumes.
Protect the surrounding area before you bring the table in. Laying down heavy drop cloths or cardboard to catch drips, dust and stripper residue chemical strippers in particular can damage flooring and finishes on contact. If you’re working in a garage don’t forget to protect nearby parked cars or stored items from dust drift.
Next, disassemble what you can. Remove any leaves extensions or removable hardware like drawer pulls, hinges or decorative trim. Working on separate pieces makes sanding and finishing far more even and it’s much easier to get into corners and edges when a tabletop isn’t attached to legs. If the legs unscrew or detach, take them off too. You’ll get a cleaner, more consistent finish and avoid awkward angles while sanding or brushing.
Finally set up sawhorses or a stable elevated surface to work at a comfortable height and make sure your lighting is bright and even so you don’t miss thin spots or drips.
Stripping the Old Finish
With your table prepped it’s time to remove the old finish down to bare wood. The most common method is chemical stripping. Apply a thick even coat of stripper with an old brush following the product’s recommended dwell time usually 15 to 30 minutes or until the finish bubbles and softens. Don’t let it dry out; some strippers need reapplication on stubborn spots. Once softened use a plastic or metal scraper to gently lift the finish working with the grain then follow up with steel wool or synthetic pads to clear remaining residue from corners and carved details. Neutralize the surface afterward with mineral spirits or water (depending on the stripper type) and let it dry fully before moving on.
A heat gun is another option especially for thick stubborn layers of paint or varnish. Hold it a few inches from the surface moving constantly to avoid scorching the wood and scrape softened finish as you go. It’s faster in some cases but carries real fire risk on dry old wood; never leave the heat gun stationary and keep a fire extinguisher nearby.
If your table only has minor wear rather than a heavy old finish you may be able to skip stripping altogether and sand directly instead.
Whichever method you use, dispose of stripper-soaked rags and steel wool safely; many are combustible and should be laid flat outside to dry before disposal never balled up in a trash can.
Repairing Damage
Once the old finish is off you’ll likely spot problems that were hiding underneath this is your chance to fix them properly before sealing everything back in with a new finish.
Start with small imperfections like scratches, gouges and nail holes. Wood filler works well for painted or stained surfaces where color matching isn’t critical while epoxy putty offers more durability for high-traffic spots. Press the filler firmly into the damaged area slightly overfilling since it will shrink a bit as it dries then let it cure fully according to the product’s instructions before sanding it flush.
Water rings and heat marks often sit just below the surface and can sometimes be lifted with careful sanding alone especially now that the old finish is gone. For deeper stains a light application of oxalic acid (wood bleach) can help even out discoloration before you refinish.
Loose joints are common on older tables and shouldn’t be ignored; a wobbly table only gets worse with regular use. Work fresh wood glue into the loose joint, clamp it firmly and wipe away excess glue immediately so it doesn’t block stain absorption later. Let clamped joints cure for at least 24 hours.
Warped or split wood is trickier and sometimes best addressed with clamping and glue for splits though severe warping may require professional help or accepting it as part of the table’s character.
Sanding the Surface
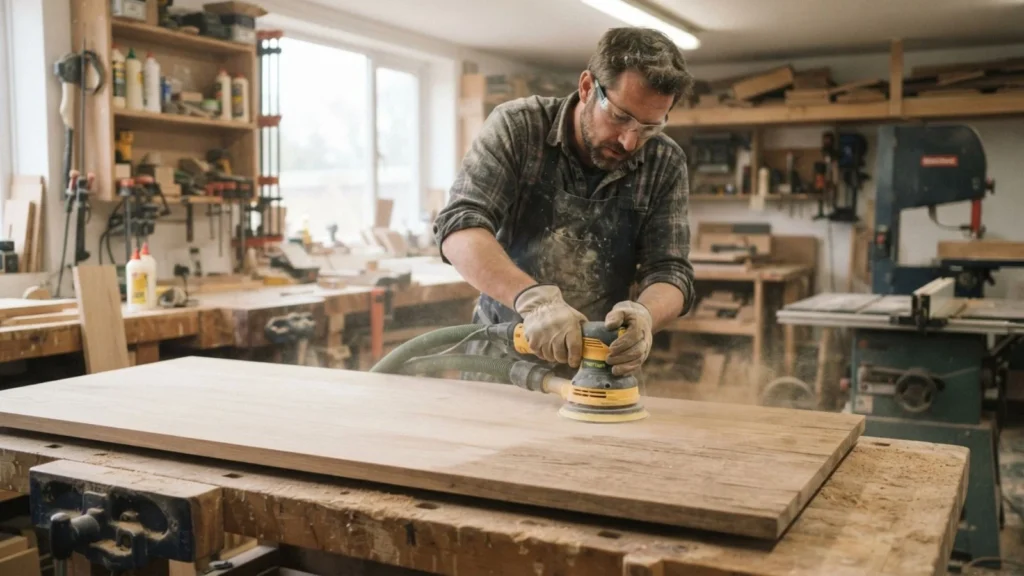
With repairs cured sanding is where your table really starts to transform. Work through grits progressively rather than jumping straight to fine paper this removes stripper residue evens out repairs and smooths the wood without leaving deep scratches a finish would only highlight.
Start with 80 or 100 grit if there’s leftover finish or rough patches moving the sander steadily and evenly across the surface. Always sand with the grain never against or across it cross-grain scratches are notoriously visible once stain or finish is applied. Move up to 150 grit next to refine the surface then finish with 220 grit for a smooth ready-to-finish feel. Run your hand across the wood between passes; you should feel no roughness ridges or fuzz.
An orbital sander handles flat open areas efficiently but edges corners table legs and any carved or turned details need hand-sanding with a sanding block or folded paper to avoid gouging or rounding off details you want to keep sharp.
Dust management matters more than people expect. Wipe the surface down with a tack cloth or vacuum thoroughly between grit changes leftover dust gets trapped under stain or finish and creates a gritty uneven texture.
Watch for common mistakes: pressing too hard (which causes swirl marks) sanding unevenly at edges (which rounds them unintentionally) and skipping grits (which leaves scratches the next grit can’t fully remove).
Staining (Optional Step)
If you’re keeping the wood’s natural tone or simply refreshing a clear finish you can skip straight to the topcoat. But if you want to change or deepen the color staining is where that happens and it’s worth doing carefully since mistakes here are harder to fix later.
First choose your stain type. Oil-based stains are forgiving and blend well. Water-based stains dry faster and have lower odor and gel stains sit on the surface rather than soaking in which makes them great for uneven or blotchy woods. Always test your chosen stain on a hidden spot like the underside of the table or a leftover scrap of the same wood so you know exactly how the color will look before committing to the whole surface.
If you’re working with a blotch-prone wood like pine birch or maple apply a pre-stain wood conditioner first. It helps the wood absorb stain more evenly and prevents the splotchy uneven look these woods are known for.
When applying stain work in manageable sections with a rag brush or foam applicator always moving with the grain. Let the stain sit for the time recommended on the can, usually a few minutes, then wipe off the excess with a clean cloth. The longer stain sits before wiping the darker and more saturated the color becomes so keep your timing consistent across the whole table for even results.
Applying the Finish/Topcoat
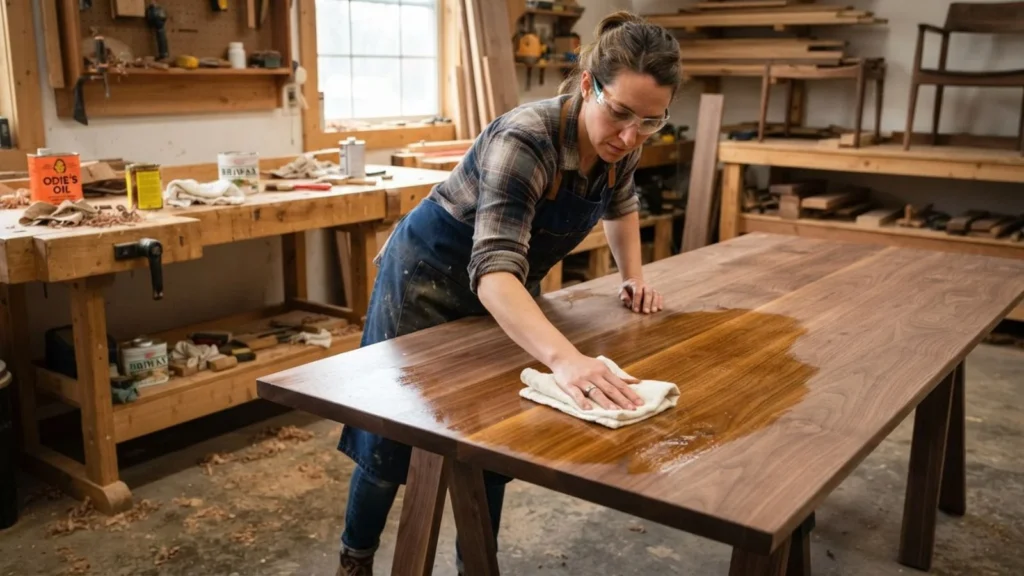
The topcoat is what protects your table from the daily reality of kitchen life spills, heat scratches and constant use so choosing the right one matters. Polyurethane is the most popular choice for kitchen tables because it’s highly durable and resistant to water and heat; it comes in oil-based (more amber more durable) and water-based (clearer faster drying) versions. Varnish offers similar protection with a slightly different sheen and application feel. Lacquer dries fast and gives a glass-smooth look but is less heat-resistant making it a tougher sell for a table that sees hot pans. Oil finishes like tung or Danish oil soak into the wood for a natural look and are easy to touch up though they offer less protection against water rings. Wax gives a soft low-sheen finish but wears the fastest and needs frequent reapplication.
Whichever you choose, apply thin even coats rather than one thick one thick coat drip pool and take much longer to cure properly. Use a high-quality brush for polyurethane or varnish or a lint-free rag for oil finishes always working with the grain.
Plan on at least two to three coats for real durability with adequate dry time between each check your product’s label since this varies widely. Lightly sand with 220-grit or finer sandpaper between coats then wipe away dust to knock down any raised grain or imperfections and help the next coat bond smoothly.
Curing & Reassembly
It’s tempting to treat your table as finished the moment the last coat feels dry to the touch but “dry” and “cured” are two very different things. Dry simply means the surface isn’t tacky anymore which usually happens within a day. Cured means the finish has fully hardened all the way through and reached its maximum durability and that can take anywhere from two to four weeks depending on the product and environmental conditions like humidity and temperature.
During this curing window, treat your table gently even though it looks finished. Avoid placing placemats, dishes or other objects directly on the surface for extended periods since they can leave impressions or prevent the finish from hardening evenly underneath. Skip cleaning products entirely for now even mild ones can interfere with the curing process. If you need to wipe up dust use a soft dry microfiber cloth only.
Once the finish has healed you can safely reattach any leg extensions or hardware you removed earlier. Make sure joints are snug and stable and double-check that any glued repairs from earlier steps have held properly under the new finish. If you notice any wobble, address it now before the table goes back into daily use.
This waiting period is often the hardest part for eager DIYers but rushing it risks damaging weeks of careful work. Patience here is what separates a finish that lasts for years from one that shows wear within months.
Maintenance Tips

After all the work you’ve put in, a little ongoing care goes a long way toward keeping your table looking freshly refinished for years to come. The biggest daily habit that protects your finish: use coasters, placemats and trivets consistently especially for hot dishes, cold glasses and anything acidic like citrus or wine that can etch or discolor a finish over time. Wipe up spills promptly rather than letting liquid sit since standing water is one of the fastest ways to damage even a durable topcoat.
Be mindful of what you clean with. Harsh chemical cleaners, ammonia-based products and abrasive scouring pads can dull or damage your finish over time, even a tough polyurethane coat. Stick to a soft slightly damp cloth for everyday cleaning and dry the surface immediately afterward rather than letting it air dry.
If you chose an oil or wax finish rather than polyurethane or varnish plan on periodic maintenance rather than a one-and-done application. Oil finishes typically benefit from reapplication every six months to a year depending on use while wax finishes may need refreshing every few months to maintain their protective layer and sheen.
Even with excellent care expect that most kitchen tables will eventually need another full refinish down the road, often somewhere in the five-to-fifteen-year range depending on the finish type and how hard the table works for its living. Knowing this upfront helps you enjoy the table now without stressing over every small mark.
Troubleshooting Common Problems
Even careful work can run into hiccups so it helps to know how to diagnose and fix the most common finishing problems before they become permanent.
Blotchy stain usually happens when wood absorbs color unevenly especially with softer or open-grained woods like pine. If you catch it before the topcoat goes on, light sanding and a fresh more even coat of stain, ideally after applying a pre-stain conditioner you may have skipped, can often correct it. Once sealed under a topcoat blotching typically means sanding back down and starting the staining process over.
Bubbles or brush marks in the topcoat often come from applying finish too thickly, working too fast or using a lower-quality brush that doesn’t lay finish down smoothly. Let the coat cure fully then sand it smooth with fine-grit paper and apply a thinner more careful coat moving at a slower more deliberate pace.
Tacky or sticky finish that won’t cure is frustrating but usually traceable to humidity, cold temperatures or an overly thick application. Move the table to a warmer drier space if possible and simply give it more time. Some finishes need weeks in poor conditions. If it never hardens you may need to strip and reapply.
Uneven sheen across the surface often results from inconsistent application or sanding between coats. A final light uniform coat applied evenly across the whole surface sanding lightly beforehand usually resolves the inconsistency.
Conclusion
Refinishing a wooden kitchen table is one of those projects that feels intimidating before you start and deeply rewarding once you’re done.
What began as a scratched dull or water-stained surface can end up looking and functioning like new with the added satisfaction of knowing you did it yourself.
Every step from that first careful assessment to the final coat of finish plays a role in the final result so the patience you put into stripping, repairing sanding and curing really does pay off in durability and appearance.
Don’t be surprised if this project teaches you a few things about your table. You never knew whether it’s the wood species hiding under years of old finish or joints that needed attention long before the wobble became obvious.
That’s part of what makes refinishing worthwhile: you end up with a genuinely better table, not just a shinier one.